Why choose Twilio’s SendGrid?
SendGrid provides domain authentication, compliance and deliverability coaching, and proactive ISP outreach to guarantee that you receive optimal inbox delivery. Whether you are a small business or a major corporation, SendGrid can handle your critical emails. Their world-class platform sends over 100 billion emails per month.
SendGrid offers a FREE starter plan which allows for 100 emails per day for life. So, it’s perfect if you’re just getting started. You can click the button below to be redirected to Twilio’s sign-up page.
Configuring appryzePRO SMTP for SendGrid
To boost email delivery on your appryzePRO site, use the SendGrid SMTP service. SendGrid is a popular WordPress mailer that is both reliable and simple to configure. This tutorial will teach you how to set up and configure the SendGrid driver with appryzePRO‘s SMTP service.
Under the Settings -> Settings menu in the left-hand panel, select SMTP Configuration. If this is your first time setting up SMTP on this site and you have not yet established a connection, you will see a list of possible Mailers; because we will be working with SendGrid, select SendGrid from the list.

If you already have one or more SMTP driver settings and wish to add SendGrid, go to the Settings Tab and click Add New Connection. Once again, all available drivers will show, from which you can then select SendGrid.
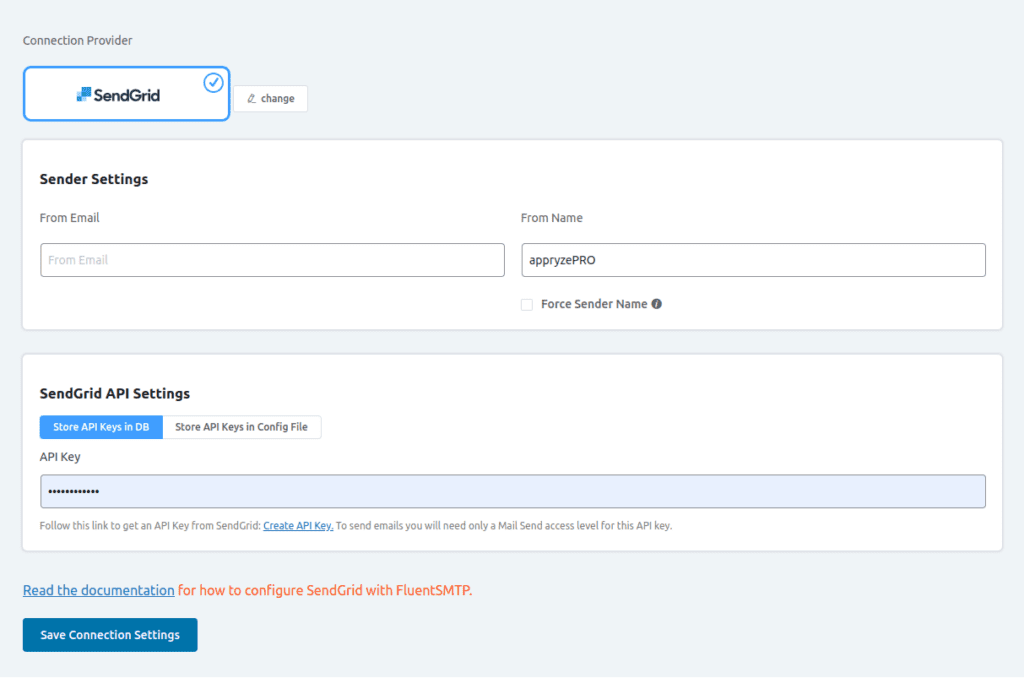
Configure Your Sender Settings
We will now need to configure the sender information. Fill in the “From Email” and “From Name”.
From Email: The “From Email” field should contain the email address you verified with SendGrid.
From Name: You can use any name you desire. You may use a mix of your name and company name. For example, I could use “Pete From appryzePRO” where Pete is my name and appryzePRO is obviously my company.
SendGrid will provide you with your API Key when you click “Create API Key” under the API Key field.
Getting your SendGrid API Key
1.) Log in to your SendGrid account first, and then click the Settings button in the bottom left corner.
2.) A dropdown panel will open, and you should select API Keys.
3.) Now, in the top right corner, click the Create API Key button.
4.) Name your key (I suggest using your domain name).
5.) Select Full Access
6.) Click Create and View
7.) Click the long string of characters (the API Key) to copy it to your clipboard.
8.) Paste it into the API Key field in your appyzePRO site’s SMTP Settings
9.) Click Save Connection Settings
You can now send an email test to any email you’d like using the Email Test
